Tuesday, December 22, 2015

Jam Thumprint Cookies

Christmas is almost here! Of course that means we are all looking for some yummy cookies to swap at a party, leave out for St. Nicholas, or just share with friends and family. I'm a fan of fruity desserts, so jam thumbprints are one of my favorites. You can fill them with whatever flavor jam you want, heck you could even go crazy and use a fruit curd, or even chocolate or caramel! - but these ones happen to feature a holiday flavor that is very special to my family. I filled mine with homemade kumquat marmalade.

For more about our family's kumquat traditions and some more recipes check out Kumquat Christmas Drink, and Kumquat Refrigerator Pie.


Jam Thumbprint Cookies

1/2 cup powdered sugar
1 cup softened butter
1 Tbsp vanilla
2 1/2 cups sifted flour
1/2 tsp salt
Jam


Beat together sugar, butter, salt, and vanilla until fluffy. Add flour and mix well.

Chill the dough for at least an hour. Preheat the oven to 350 degrees.

Shape chilled dough in to small balls and place on an ungreased cookie sheet. Make a small dent in the center of each dough ball with your thumb. Bake for 7 - 9 minutes.

Remove from the oven and let cool. Once the cookies are cool, fill the middle with your favorite jam or other filling.  Enjoy!

Saturday, December 12, 2015

Feast of St. Juan Diego Enchiladas

We made one of my favorite things for Wednesday's feast of St. Juan Diego, enchiladas! The recipe comes from my great-grandma Martinez, where most of our family's authentic Mexican recipes come from. If you love Mexican food, don't forget to check out her recipe for arroz con pollo.

   Sometimes when life gets busy and crazy, I don't always get the chance to do the feast day celebrations that I would like to. But one that we get in every single year is St. Juan Diego and Our Lady of Guadalupe. It helps that not only are they tied together , (You can't tell the story of one without the other!),  but their feast days are a just a few days apart, giving me the flexibility to cook Mexican on either St. Juan Diego's feast day, Our Lady's or some day in between the two. And of course these are especially special feast days for our family not only because St. Juan Diego is my son's favorite, but because it helps us to celebrate my family's Mexican heritage.

   Now, most people in these here United States would think of an enchilada as a filled and rolled tortilla smothered in sauce. These enchiladas are not like that, and in fact, the first time I saw an enchilada made that way, it baffled me. In my world, that just not how it's done! For these enchiladas, the tortilla is dredged in a chili powder slurry before being dipped in hot oil and then filled and baked. Now, I've never been to Mexico or eaten an enchilada in Mexican town, (tacos yes, enchiladas no), so I can't say that everyone else is doing it wrong, but this is the way my Mexican mama taught me to make them, and her's before that. If my little brother is coming over, make sure you make a big tray, because these are his favorite.


Enchiladas (this is one of those recipes where I don't measure too much!)

Ground beef, 1-2 pounds
Potatoes, about the same volume as the beef
Onions and garlic, diced and minced (optional)
Chili powder (get a big one, you're going to need a lot!)
Salt and pepper
Flour toritillas
Vegetable oil or shortening
Cheddar cheese, shredded

For the Filling:
Peel, dice, and boil the potatoes until tender. While the potatoes are boiling, brown the ground beef with the onions and garlic. Season with salt, pepper, and a whole bunch of chili powder. Drain the potatoes, add them to the meat, and mix then together.

Assembly:
Now it's time to get ready to put things together. You will be dealing with hot oil and a messy red chili powder slurry, so call the big kids and adults together to form an assembly line, and make sure you have everything set up and ready to go before you start. You will need:

 - A pie tin or baking dish filled with a mixture of chili powder and water. The word I've been using is slurry, It should be somewhere between a liquid and a paste.
- a skillet with with hot oil or melted shortening
- a plate for receiving hot tortillas
- a plate for rolling and filling
- a 9 x 13 baking dish or two for completed enchiladas

1. Dip the entire tortilla in the chili powder mixture, completely coating it.

2. Use tongs to dip the coated tortilla in the hot oil. Do not let the tortilla get crispy! You only need to dip it for a few seconds. Put the tortilla on the receiving plate.

3. Put a heaping spoonful of filling into the tortilla, roll it up, and place seam side down in the baking dish. Yes, I do this with tortillas that have just come out of hot oil. It usually involves  a bit of saying. "Hot, hot, hot!" while I shake my hands and jump up down a little. Be careful out there folks!

Baking:
 Once you have filled your pan, and you can squeeze a lot in there - if you think it's full, just squish them together a bit and you can fit in more - cover the top with the shredded cheese  and bake in the oven at 350 degrees until the cheese is melted and everything is heated through.

Eat and enjoy! We like to serve them with some Spanish rice or refried beans on the side. If you feel the need to top them with things like salsa and sour cream just don't tell me about it.

Monday, December 7, 2015

Heavenly Angel Food Cake

    As much as like to decorate cakes, I'm not really a big cake eater when it comes to traditional American style cakes covered in frosting. Sure, when I was little I enjoyed licking the frosting off, but as an adult even the frosting can be a little much sometimes. To tell the truth, I'd much rather have a birthday pie than a birthday cake. Perhaps cherry, or one of my favorite fruit combinations - blueberry and rhubarb, also known in our house as bluebarb.

   So no yellow cake with chocolate frosting and sprinkles for me. But if I'm making a cake that I'd really enjoy eating myself, it's got to be angel food cake; a light and fluffy pillow of delicate sweetness, and the perfect thing to pair with fresh fruit and whipped cream, yum!


  Angel food cake has actually become a Thanksgiving tradition in our family because it is my grandfather's favorite dessert. When I became old enough to bring my own contributions to our annual celebration of Thanksgiving in the barn, I started bringing homemade angel food cake as a special treat for him. When grandpa was not able to come out to the barn anymore, I started making two angel food cakes, one for everyone else, and one just for him. He is a World War II hero who raised nine children, I'd say he deserves it. This does mean we go through a lot of eggs in November! Now I try to bring an angel food cake with me every time we visit, not just for Thanksgiving, so it's kind of my specialty. And trust me, once you've had homemade angel food cake made from scratch, a store bought one just can't compare!

Heavenly Angel Food Cake

12 eggs
1 1/4 cups powdered sugar
1 cup all purpose flour
1 1/2 teaspoons cream of tartar (optional - I actually leave this out quite frequently!)
1 1/2 teaspoons vanilla extract
1/2 teaspoon almond extract
14/ teaspoon salt
1 cup white sugar

1. Seperate the eggs. Put the whites in a large mixing bowl, and set the yolks aside for some other use like fruit curd or pasta. I like to seperate the eggs over a small bowl, and transfer the the egg white into the big bowl after I seperate each egg, so that way if I mess up and break the yolk, I don't mess up the whole thing.

2. Add the cream of tartar, extracts, and salt to the egg whites. As you gradually add the white sugar, beat on high until stiff peaks form. Set aside

3. Sift the powdered sugar and flour together three times. Gently fold this into the egg white mixture. Transfer the cake batter into an ungreased tube pan. (Ungreased is very important! Angel food cakes are cooled upside down. One time my mom wasn't thinking and greased the pan and the whole thing slid out onto the counter making a big mess!)

4. Bake at 350 degrees for 40 - 45 minutes. Turn upside down to cool completely before removing from the pan. Traditionally you would rest the pan on top of a glass pop bottle or something, but nowadays most angel food cake pans have little "feet" to rest on when you flip them over.

Serve plain or with toppings of your choice, and enjoy!

Friday, November 20, 2015

Nutrition Packed, Kid Friendly Chili

   Those of you have read my blog before probably know how incredibly picky my family, and especially my 5 year old boy, can be with their food. Picky eaters are one of my biggest pet peeves and sometimes it seems like I'm surrounded by them! I'm sure most of you moms out there can relate to the struggle of trying to get your kids eat the delicious, healthy food you make. I'm sure many of my fellow moms sometimes feel like giving up and just serving chicken nuggets and pizza to avoid the fight. I know I do sometimes. However, I try my best to not give in and get creative instead.

   The weather is getting colder now, and what could be more comforting than a nice bowl of spicy chili? Well, if it has "stuff" in it like beans and pieces of tomato, a picky child might say a lot of things would be better. Challenge accepted and won! I was able to come up with a chili recipe that packs in the nutrition of beans and other vegetables while still giving the kids the simplicity of meat and sauce that they want. No "stuff," (that they can see anyway.)


 As you can see from the decorations and garnishes, the first time we made it was around Halloween. We had just seen the chefs on "The Kitchen" top chili with tortillas that were cut into fun shapes with cookie cutters and fried. Of course we already know that fried tortillas are delicious, (have you tried making tostadas on Tuesday instead of tacos?), and my five year old really wanted to give it a try. It was a lot of fun and he is already talking about how we could use different cookie cutters during different times of the year whenever we have chili. Just heat up a little oil on in a frying pan on the stove, and fry your tortillas until golden brown and delicious. Make sure that you season them while they are still hot.

Break out the blender, it's time to trick children into eating things that are good for them!

Nutrition Packed, Kid Friendly Chili
 
Ingredients:
1 to 2 lbs ground beef or turkey
1 can red kidney beans
1 12 oz can tomato paste
1 cup pumpkin puree
4 cups vegetable, chicken, or beef stock
1/4 of an onion
2 tsp. minced garlic
1 jalepeno
2 Tbsp chili powder
1/4 tsp cayenne
1 tsp cumin
1 tsp cinnamon

1. Brown the beef or turkey in a pan, set aside. (Drain fat if using beef.)

2. Chop the onion and jalepeno, and saute together until the onion is translucent.

3. Place the onion, jalepeno, and red kidney beans, (including the liquid from the can), in a blender, and blend until smooth.

4. Place meat, bean puree, and all remaining ingredients in a slow cooker, stir to combine, and cook on low for 4 to 6 hours. You can also place ingredients in a regular pot and cook on low heat until everything is heated through.

5. Serve with your favorite chili toppings: cheese, sour cream, green onions, fried tortillas in the shape of a bat, etc. Enjoy!


 - Of course feel free to adjust to your own tastes! I only used one pound of meat the first time I made it and there was a request that it be meatier, so I increased the amount. If you don't like things spicy, leave out the jalepeno and cayenne, if you like things really spicy, add more! As my dad would say, "If you want to put something else in, go ahead, ain't no big deal. As long as no one starts poking it with a fork and mumbling, 'Had a failed science experiment look like  this once, only it smelled better,' you're doing just fine."


Thursday, October 29, 2015

Rosemary's First Birthday

Happy Birthday Rosemary! My little baby is now one year old. She's walking, almost talking, and loves to cuddle. We had a very nice family party in our backyard the weekend before her birthday. As many of you may know, I love a good theme. So what was the theme for this very special occasion you might ask? Well, for Sam's first birthday we did Green Eggs and Ham, so for Rosemary's first birthday the theme was...rosemary!

There is a sweet little song by Edison Lighthouse from 1970 called Love Grows (Where My Rosemary Goes). I used that phrase for the invitations and on the cake. I actually love cooking with the herb rosemary, so I tried to incorporate it as many ways as possible. Of  course that included my signature rosemary shortbread cookies. I was so excited to get adventurous and try these recipes!  I did include a few dishes without rosemary just in case someone wasn't a fan.


 I had a lot of fun making these charming little centerpieces. I do wish my rosemary had been a little longer, but they still turned out adorable. It was pretty simple. I got some pink flowers and rosemary from the store, put them in a pint sized mason jar, and decorated the jar with some pink ribbon and a happy birthday message printed on cardstock. I used clear double stick tape to attach the ribbon and message to the jar. Voila! A country chic centerpiece perfect for a girl's party.


No I haven't learned how to make frosting roses yet, I have to give credit to my mom for that one, but the rest was all me! The cake was made from scratch too, which I haven't done in a while. I used a recipe I had from when I helped make cake for a friend's wedding. An apple spice cake seemed perfect for a fall birthday! The cake uses honey as the sweetener instead of sugar, so here is a great tip I learned from watching one of my favorite shows, "The Kitchen." - spray your measuring cup with non-stick spray before you measure the honey, and it will just slip right out. I tried it and it worked! It's amazing! It's going to make measuring and cleaning up when cooking with honey so much easier from now on.

Apple Spice Cake
1 cup (2 sticks) butter, softened.
1 1/2 cups honey
4 eggs
3 tsp vanilla
2 cups applesauce
4 cups flour, sifted
3 tsp cinnamon
1 tsp nutmeg
1 tsp ginger
1/2 tsp cloves
4 tsp baking powder
1 1/2 tsp baking soda

Beat butter and honey together until it gets fluffy, then beat in eggs and vanilla. Mix in applesauce. Sift in dry ingredients. Mix well. Batter will be thick. Grease a 9 x 13 cake pan and bake at 325 degrees for 45+ minutes, or until a toothpick comes out clean.

Allow to cool completely in the pan before frosting. (preferably with a homemade cream cheese frosting!)


 Rosemary Chicken Salad
 I doubled the recipe for the party

3 cups cooked chicken (I put a family pack of chicken breasts in the slow cooker with a little water until they were easy to shred). 
1/4 cup plain yogurt
1/4 cup mayonnaise
2 Tbsp chopped fresh rosemary
a squirt of Dijon mustard
chopped celery
salt to taste

Whole Wheat Rosemary Carrot Bread
This was one of my favorite recipes that hadn't made for a while. I adapted it from a plain carrot bread recipe in a bread cookbook. This was the book that told me to make any white bread recipe into a whole wheat recipe by just replacing half the white flour with whole wheat. I use this tip a lot! I was excited to bring the recipe out again!

2 packet dry yeast
1 1/2 cups water
2 1/4 cups whole wheat flour
2 1/4 cups all purpose flour
2 tsp salt
2 1/4 cups grated carrots
2 Tbsp chopped fresh rosemary
1 Tbsp melted butter

Sprinkle the yeast into 1/2 cup of the water. Let it stand for 5 minutes. Stir to dissolve.

Mix the flour and salt in a large bowl. Make a well in the center and pour in the dissolved yeast. Add the carrots, rosemary, and butter to the well. Mix in the flour. Stir in the remaining water, as needed, to form a moist, crumbly dough.

Turn the dough out onto a lightly floured surface. Knead until smooth but still sticky.

Put the dough in a covered bowl and let rise until doubled in size, about 1 1/2 hours. Punch down and let it rest for 10 more minutes.  (Rising tip -do your baking and laundry at the same time and proof your bread on top of the warm dryer!)

Shape the dough into a round loaf.  Place on a floured baking sheet and cover with a dish towel. Let it rise again until doubled in size, about 45 minutes.

Bake  for 45 minutes at 400 degrees, or until golden and hollow sounding when tapped underneath. Cool on a wire rack.

Rosemary Parmesan Quick Bread
A great bread for a busy weeknight! It has the ease of a quick bread, but the taste of yeast bread. I upped the rosemary from 1 tablespoon to 2.


Pesto Caprese Salad
I had a ton of basil in my garden this year, (just about the only thing I had a ton of!) and had just made a load of pesto. I had also just helped out my dad by picking a bunch of tomatoes from his garden before a frost came. Pesto, tomatoes...pesto, tomatoes...I eventually put two and two together, grabbed some fresh mozzarella and came up with this tasty and classy salad!

Basil Pesto
Grape or Cherry tomatoes, halved
fresh mozzarella, cut into chunks

Mix them together. Done!


Sparkling Honey Rosemary Lemonade
When kids turn one they are finally allowed to eat honey - so why not add a little sweetness to the party? Don't forget to spray your measuring cup with non-stick spray!

Recipe courtesy of Nutmeg Nanny - http://www.nutmegnanny.com/2013/10/14/sparkling-honey-rosemary-lemonade/


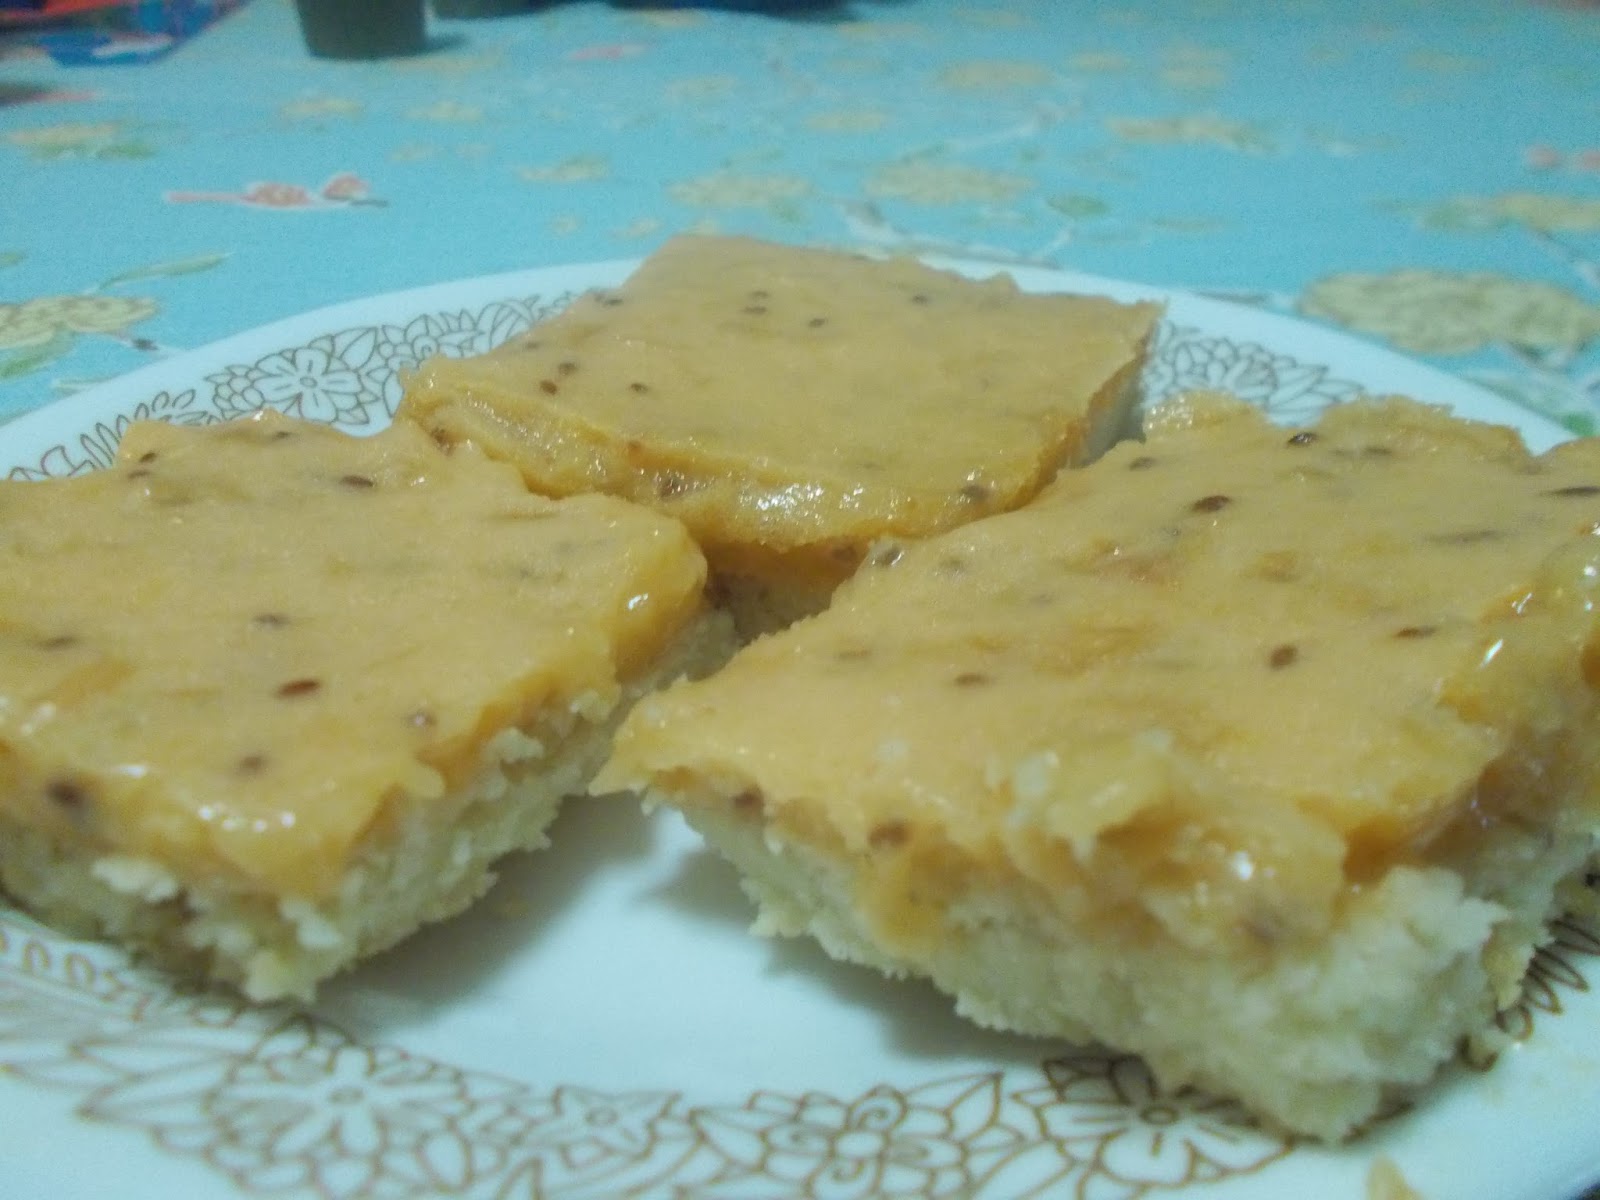
 Rosemary Shortbread Cookies

What kind of Rosemary themed party would it be if I didn't include my personal favorite and signature cookie, rosemary shortbread? My blog post with this recipe includes lemon zest, but this time I made them straight up, no lemon.

http://sarahrosessupposes.blogspot.com/2013/12/rosemary-lemon-shortbread.html


 Happy Birthday Rosemary! I love you so much and I can't wait to see where life takes you!


Monday, October 5, 2015

My Happy Saints Office

I am happy to say that I am starting off a new school year in a newly cleaned and organized home office! Last year I didn't clean it once all year and it was, to say the least, a disaster area. I made it through, but I'm hoping that keeping my office organized and clean will make me a more productive and effective teacher this year. As those of you who read my blog regularly may know, I am a 6th grade teacher for a virtual public charter school. I teach and monitor my students from my computer at home, and the students work from their homes with a parent or other adult who is designated their "learning coach." You have many of the benefits of public school, and many of the benefits of homeschooling all rolled into one.

My Wall O' Saints. It was hard to get a good picture with the glare from the light. Sorry!


 One of my favorite features in my newly organized office wouldn't be possible without working from home, and that is my wall of saints! In a brick and mortar public school, I of course wouldn't be allowed to plaster images of saints all over my classroom walls, (maybe some small things on my desk, but not all over the walls!). Since I am working from my own home, I can put as many saints as I want all around my office to provide me daily inspiration! Yay!

I chose to use images from Happy Saints for my wall o' saints to help give my office that elementary classroom vibe. They really go with my purple walls and fun, colorful, education themed accents and artwork.

The top row are my education/work saints. They help to remind me of the value and impact of education and the teaching profession, as well as remind me to make God present in all my daily tasks.

St. Francis de Sales - Patron of teachers and writers. Also a great saint to remind you not to worry and stress when things get crazy!
St. Josemaria Escriva - Founder of Opus Dei which means "Work of God." Opus Dei is dedicated to teaching that everyone is called to holiness, even in every day work and ordinary life.
St. John Bosco - Started a school for wayward boys. Patron of youth and school children (and magicians!) My favorite quote from him, "Run, jump, play but do not sin!" Many of the students who come to us could fall into the category of "wayward."
St. Elizabeth Ann Seton - Started the first Catholic School in the United States and was a mother of 5. She was a working Catholic mom in the field of education just like me!


The second row are my more personal patron saints that have been with me as I've grown and changed through life.

St. Cecelia - My childhood saint. Patron saint of musicians and early martyr of the church. I chose her as my patron saint for my confirmation back when I was eight years old. I still love to sing and play the piano!
St. Joan of Arc - My teen/young adulthood saint. I started falling in love St. Joan in middle school when I read the book Young Joan by Barbara Dana, and I continued to fall in love with her even more in high school when I read Joan of Arc by Mark Twain. Our lives are very different, but I greatly admire her strength and confidence in all the dangers she faced, even when on the inside she still felt like a simple, vulnerable, young girl.
St. Gianna Molla - My adulthood saint. It is hard being a working mother, and it can seem even harder than normal sometimes when so many of your friends are amazing stay at home moms. St. Gianna is my reminder than even a working mom can become a saint!


If your job or career isn't inherently faith based, how do you incorporate faith into your work life? I'd love to hear!

* note - in case you were wondering, Catholics do not worship saints. We hold them up as excellent examples of  living the faith and we ask them to pray for us. Just like one might look up to their parents or other inspiring person as a good example for how to live life, and asking those people to pray for us! Saints are our friends in heaven. They are close to God and their prayers are powerful!  We use images of saints just like one might keep pictures of their friends and family in their home or workplace. Remember that we are called to be saints!

Saturday, October 3, 2015

Broccoli Cheddar Biscuits

I love broccoli. That's right, I said it. I love broccoli! I always have since I was a little kid. My brothers and sisters felt the same way. When mom made broccoli with cheese sauce for dinner it was a huge treat and we gobbled it up. My youngest sister even requested broccoli with cheese sauce for her third birthday. Imagine my surprise to grow up and learn that other people don't feel this way about this lovely little tree-shaped vegetable. I was shocked! And now I am raising one of broccoli's most vehement opponents, my son Sam. When we had him try "just one bite," he literally threw up. Literally. Threw. Up. What's a broccoli loving mama to do to get her children to eat their vegetables?

Put it in a baked good of course! If you bake it, my son will eat it. (See my whole wheat pumpkin pancakes and whole wheat spinach parsnip muffins!)

Now, this isn't a hidden vegetable recipe. The biscuits do have a distinct broccoli flavor. But with the soft texture of the biscuit and the flavor boosters of cheddar and garlic, even my Sam said he liked them!

Broccoli Cheddar Biscuits

1 crown of broccoli
Biscuit mix (I usually use Jiffy)
1 cup of shredded sharp cheddar cheese
1 tsp garlic powder

1. Chop the broccoli crown into pieces and pulse in your food processor until it has a crumb like texture.  (see picture)

2. Make one recipe of drop biscuits according to the biscuit  mix directions.

3. Mix in the broccoli, cheese, and garlic powder.

4. Bake biscuits according to biscuit mix directions.

Enjoy!


Sunday, September 20, 2015

Girly Dance Cake

Just another dance cake I did recently for a birthday party at the local dance studio I work at! The selected dance style was hip hop, but I've been finding it difficult to come up with a variety of hip hop designs with my current skill set and available decorating time. So this one was more of a generic dance cake. I found a clip art image of the word "dance" in a swirly heart and I thought it was so cute and perfect for a dance party cake! The colors were supposed to be pink and purple, but the purple seemed to turn a slightly baby blue after I took the cake out of the freezer. The birthday girl and her friends didn't seem to mind. They loved the design and thought it was delicious too!


Click the links for more dance cake inspiration!

I know that its been a while since I've posted anything, (I think this party was back in August!), but hey, sometimes that's life. I do have some great posts coming up soon though, so keep your eye out!

Wednesday, July 29, 2015

California Roll Pasta Salad

Ahh, pasta salad. Its the perfect thing to have in your fridge during these hot summer days. Make it ahead of time, (in the evening when its cooler), and it will be ready to go when you're hungry but don't want to cook because of the heat. I love throwing some into a small container to take with me for lunch at the park.

My go-to pasta salad has been a summer seafood pasta salad; noodles mixed with cherry tomatoes, tri-color bell peppers, imitation crab, and Italian dressing. Say what you want, but I love imitation crab in pasta salad! One day when I was thinking about this my thoughts wandered over to California rolls. When I was pregnant it was some of the only sushi I could eat since most places use imitation crab which is not raw. I wondered, could I put the flavors of a California roll into a pasta salad? It turned out I could, and it was delicious! Creamy avocado dressing, crunchy vegetables, and soft imitation crab all rounded out with the flavors of sesame and soy, it was a pasta salad like none I had ever tried before.  I think this cool and refreshing take could be my new go-to pasta salad!


California Roll Pasta Salad
This is the type of recipe I don't really measure for, so amounts are approximations. Do whatever you think will taste good! I used a store bought avacado ranch dressing, but the soy sauce really helps to mellow any ranch flavor out. 

1 box short noodles like penne or rotini ( I used a veggie infused pasta made with zucchini and spinach)
Avacado ranch dressing (or other avacado based dressing.)
1 large cucumber
2 handfuls baby carrots, or one large carrot
1 -2 packages flake style imitation crab
soy sauce
sesame seeds

1. Cook the pasta, drain, and let chill in the fridge.
2. Seed and dice the cucumber and dice the carrots.
3. Add the vegetables, imitation crab, and approximately 1/2 bottle of the avocado dressing to the cold pasta. Add a few splashes of soy sauce and a sprinkle of sesame seeds and mix.
4. Return to the fridge to let it chill and have the flavors meld more, or enjoy it right away! You could even chop and sprinkle some nori on top if you felt so inclined.


Friday, July 24, 2015

Gooseberry Bars

Move over lemon bars, there's a new kind of fruit bar in town! (Don't worry lemon bars, I still love you too.)


Let me introduce you to flavorful, tart and sweet gooseberry bars! Until last year the only thing I knew about gooseberries was that my Uncle Matt got one stuck in his nose when he was a kid at his grandmother's house.

Matt: Grandma, I think I have a gooseberry up my nose.
Grandma: What do you mean you think you have a a gooseberry up your nose!? You know darn well you have a gooseberry up your nose!


Well, several years back I got my dad a gooseberry bush for his abundant backyard garden. It didn't really produce anything. He bought a few more to go with it. Some berries grew, but a deer ate them. The gooseberry bushes became quite the ordeal over years! Sorry Dad! Well, finally last year it became all worth it as the bushes have now been covered in delicious gooseberries for the past two summers. They are excellent for jam, pie, and of course the bars.

Gooseberry Curd
I'm not sure how I would describe the flavor of a gooseberry, it's kind of like describing how beef tastes to someone who has never had it before. Beef tastes like beef, gooseberries taste like gooseberries. They are quite tart, but also have a great flavor. If you like sweets made with lemons or rhubarb, I think you would also be a big gooseberry fan.

In fact, I based this recipe off of one I found for rhubarb bars, which, by the way, are also quite excellent.

The first step in making the bars is making one of my favorite things, curd. Yummy, creamy, luscious fruit curd. Yes, making desserts with fruit curd is amazing, but I'm often tempted to just eat it all with a spoon before I get around to doing anything else with it. If you use your gooseberries right away, you should have a light greenish-yellow colored curd. I waited a while after I picked them and some of my gooseberries started to ripen, so I ended up with an orangey-peachy color. They do get a little sweeter as they ripen, but they have a better flavor green. Then all you need to do is pour the curd onto a shortbread crust, bake, and cool.


 You will notice that  gooseberries have a little brown "stem" on each of them. I think it is what is leftover of the flower. These need to be taken off before you cook with them, which can be kind of a pain and take a while, but if you have some good company to have a conversation with or a good movie to watch it's not so bad. I just used a pair of nail scissors to snip each one off.


Gooseberry Bars

To prepare the gooseberries:

Combine 2 cups of cleaned gooseberries in a saucepan with 1/3 cup of water and 1/4 cup of sugar. Let it cook down until berries are soft and given off a lot of liquid. (Think of the first stage of making jam.)

For the curd:

6 egg yolks
3/4 cup of sugar
a pinch of salt
3 1/2  Tbsp butter, cut into small chunks
2 cups prepared gooseberries

In a double boiler whisk together the egg yolks, sugar and salt.
Add in the gooseberries and continue whisking.
Remove from heat, and the butter pieces one at a time, whisking as you go.

You can stop here and use the curd on cake, scones, biscuits, or just a spoon. Continue with the crust if you want to make bars.

For the crust: 

1 stick of butter - room temperature
1 cup of flour
1/4 cup of sugar
a pinch of salt

Mix ingredients in a bowl until it resembles course crumbs. Press into an 8 x 8 baking dish and let rest for 15 minutes.

Putting it all together

Bake the crust at 350 degrees for 20 minutes.
Remove the crust and pour on your gooseberry curd. Bake for another 10 minutes. Remove the bars from the oven and let them cool before serving.

Make sure you have some sort of party or gathering to bring them to so you don't eat them all yourself! (Or if you want them all to yourself, make sure you hide them!)

Bonus - bars are much harder to stick up your nose than just a gooseberry itself. (Though I wouldn't put it past some kids to give it a try!)

Related Posts Plugin for WordPress, Blogger...